Knucklehead's 2023 Grow Blog

Knucklehead

Moderator
Founding Member
Joined
Oct 18, 2012
Messages
12,777
Points
113
Location
NE Alabama
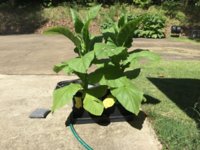
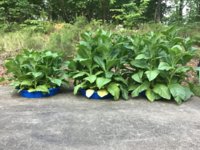
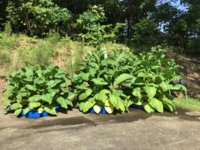
The first photo is interesting. The plants seem to be so closely spaced that, if in the ground together, they might dwarf one another. Yet with separate grow bags, they seem to be flourishing, despite the close spacing. My guess is that the grow bags are simply eliminating root competition and mutual inhibition. [Or perhaps they are not as closely spaced as it appears.]

Bob

They are packed in there. About 1 ft. apart.

One of the supposed advertised advantages of grow bags is "air pruning". Rather than spiraling around inside a hard pot, the roots are theoretically supposed to penetrate the bag, but die at the surface from the environment. The dying is supposed to encourage new growth without the bags becoming root bound. My problem last year was providing water to fabric bags. The pools seem to have made a huge difference for several different reasons.

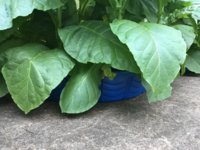
A couple other advatages that I am seeing with the taller pool sides compared to an individual saucer type reservoir is that the pool sides block the hot wind and direct sun on black fabric, reducing evaporation even further. Plus, the lower leaves intertwining due to the close spacing completely shields the top of the soil from the sun and hot wind. So far, I only water three or four days apart (at most), rather than daily like last year. I note that after a heavy dew, there is quite a bit of condensation in the pools and the surface of the soil is damp. These are 3 gal. grow bags compared to last years' 1 gal. bags, last years' bags were open to the air and sun, and summer hasn't gotten here yet and this season so far has been more often mostly cloudy rather than mostly sunny. But overall I am extremely pleased with the results so far. 31 plants contained in three 4' circular pools.
I think the two times I pumped the water out was not necessary.

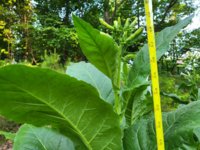
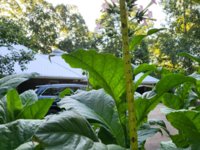
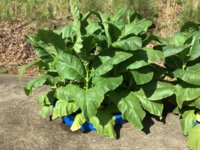
Pool sides and overlapping leaves.
edit: due to the slope of the pool sides, there is an air gap between pool and grow bags.
IMG_0845.jpeg

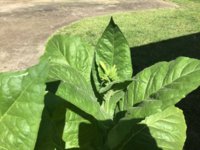
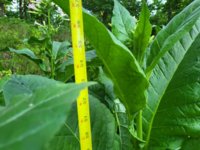
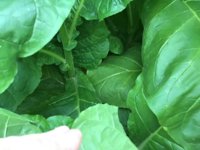
Holding back a plant for view of interior.
IMG_0846.jpeg
 
Last edited:

Knucklehead

Moderator
Founding Member
Joined
Oct 18, 2012
Messages
12,777
Points
113
Location
NE Alabama
It's really neat the way the leaves orient themselves to take full advantage of the sun, even in the interior. They some how find a way. Some of them stand back to back and straight up. Even adjoining plants seem to share sunlight, rather than try to hog it all.
 

Knucklehead

Moderator
Founding Member
Joined
Oct 18, 2012
Messages
12,777
Points
113
Location
NE Alabama
By far, hands down my easiest season. Nothing heavy, no bending over, planting was done on a truck tailgate and carried over to a sunny spot. Watering has been a piece of cake. I plan to reuse my potting soil and I'm starting compost using green grass, table scraps, and cardboard so maybe I can save soil costs.
 

Knucklehead

Moderator
Founding Member
Joined
Oct 18, 2012
Messages
12,777
Points
113
Location
NE Alabama
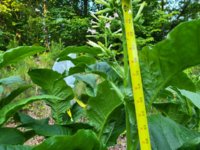
At the end of this season, it might be informative to remove several entire root balls, hose off all the soil, then photograph them, with a ruler in the image. I've done that with some garden tobacco as well as a few grown in pots.

Bob
That's a good idea. Also, let me know at what point you would like a flower head photo and tenth leaf measurements and photo. (Reams 158)
 

Knucklehead

Moderator
Founding Member
Joined
Oct 18, 2012
Messages
12,777
Points
113
Location
NE Alabama
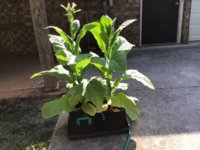
I gave all the pools a 90 degree rotation for more even sun exposure. I had skipped that last time they needed water and the plants that were facing north now seem a little more pale and more yellow on the lower leaves than the others. They are now facing east and facing the camera. Not conclusive proof of anything but I thought I would note it on the blog.

IMG_0852.jpeg
 

Knucklehead

Moderator
Founding Member
Joined
Oct 18, 2012
Messages
12,777
Points
113
Location
NE Alabama
I raised the water level in the pools by taping 2" Gorilla brand waterproof tape over the bottom of the drain hole. Summer is about here. It's starting to get hot and dry and the plants are bigger. Pool depth now 2" instead of 1". Will see how long it takes to draw up into the soil. I had previously been filling to 1" then coming back in a few hours to refill again. I may play with it and keep filling until the soil is saturated and the reservoir is filled. I haven't actually taken it that far yet.
I estimate that in two or three days half the plants from the first planting will have at least one open flower, in which case I will top all the plants in the two pools except for two plants that were from the second planting. (due to me procrastinating after I ran out of soil)

IMG_0857.jpeg
 

Knucklehead

Moderator
Founding Member
Joined
Oct 18, 2012
Messages
12,777
Points
113
Location
NE Alabama
No signs of budding yet in the smaller plants from the second planting.

IMG_0859.jpeg

Yet, fully 50% of all plants in my lone 1020 tray are budding early. I can only conclude 1020 trays bad! Evil! No bueno! I have been forking the sign of the evil eye towards it while spitting to no avail.

IMG_0858.jpeg
 

Knucklehead

Moderator
Founding Member
Joined
Oct 18, 2012
Messages
12,777
Points
113
Location
NE Alabama
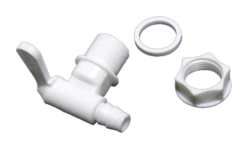
You could regulate the water level by installing one of these: https://austinhomebrew.com/products/bottling-spigot-1-2

View attachment 46274
I drilled a 2" drain hole that so far hasn't needed to be cleared of debris or dirt that blows into the pools. So far maintenance is limited to the filtered water I add from a garden hose every few days, the three times I added Miracle Grow from five gallon buckets with the transfer pump, and spinning the pools 90 degrees while the soil is dry and light for even sunlight. It's easy. Plants are full sized, I was expecting 2/3 size. Easiest season I've ever had. (I hope I didn't just jinx myself) So far I wouldn't change a thing.
Surprisingly. Not one single hornworm yet. (fingers crossed)
 
Top